In the Clinical Contact Tab you are able to add and view details about contacts you have had with the patient for the referral you have selected in the Boarding card. This includes questionnaires and their scores.
To add a new clinical contact, press the ‘Create New Clinical Contact’ link.
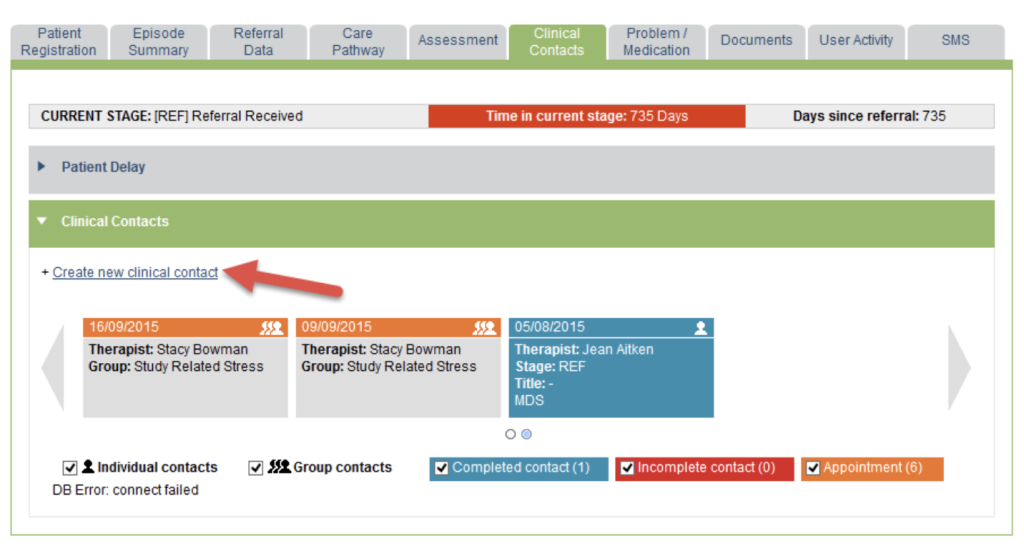
If you are an admin user, you will only be able to do this if you are working on behalf of a therapist.
The clinical contact will be created for the therapist you have selected, and the record will show both the therapist and the admin user who created the contact.
Edit a Contact
Alternatively, you may wish the ‘Edit’ an existing contact or appointment. You will firstly need to click on the contact you wish to select on the carousel.
If you created the contact, or are working on behalf of the user who created the contact, you will be given the option to edit the contact.
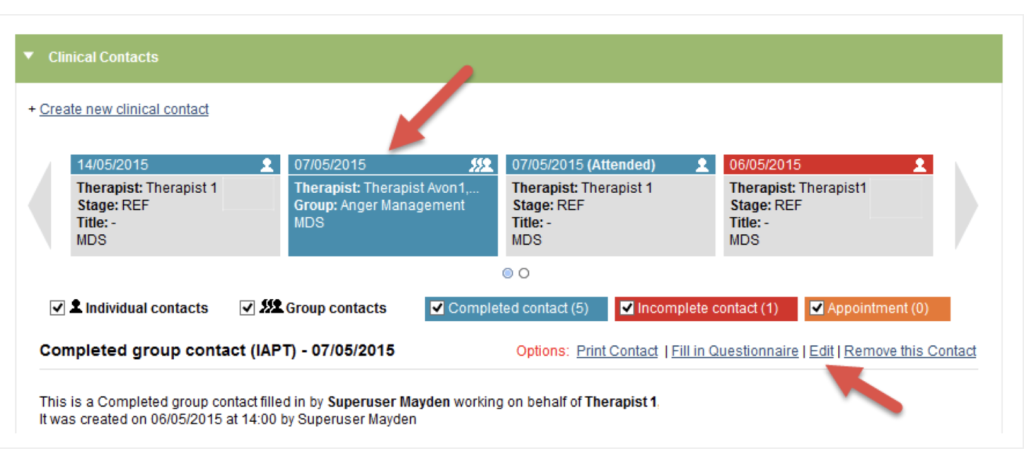
Both options will open the clinical contact form if you have selected a one-to-one contact. If you have selected a Group contact, the form to record group sessions will open in the relevant group in the Groups area.
Clinical Contact Form
Please note that the Clinical Contact Form section is one of the areas in iaptus to have an autosave function.
This will kick in after 2 minutes, and you may notice that your screen will flick to any mandatory fields that you have not yet completed, and highlight them in pink.
Based on this, If a user has multiple tabs with iaptus open where the autosave feature is used, this can cause issues as the data can be overridden thus leading to data loss or corruption.
The form is split into four sections.
- Common Fields,
- Dates and Service,
- Questionnaire Section 1
- Questionnaire Section 2 (includes clinical notes).
Common Fields
In this section you can record when the contact occurred. You also have the option to record the specific time, although the system will default to the current time.

You also need to record the care pathway stage that the clinical contact occurred at.
This is the only link between the contacts and the care pathway, and is important to get this correct so that your service can correctly report on the information.
The drop down list will automatically default to the current care pathway stage, but you are able to select from all the care pathway stages that the client has moved through in the referral.
Dates and Service
In this area you can record information about the type of contact that you are entering onto the system.
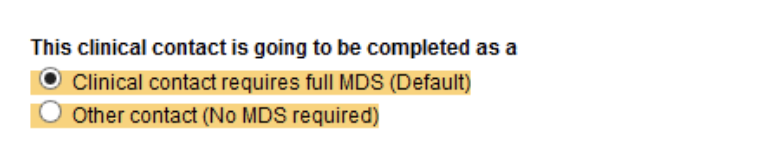
Firstly you need to record whether this contact is an MDS (Minimum Data Set) contact, or where it is a contact where MDS does not need to be recorded.
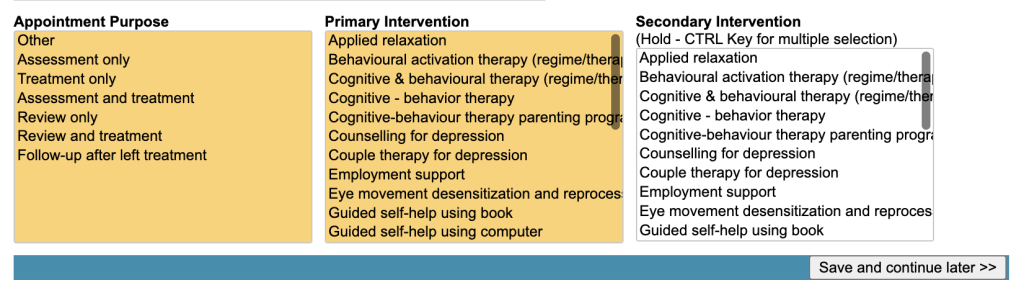
After this, you can record the following contact information, some of which may be mandatory depending on you service preference:
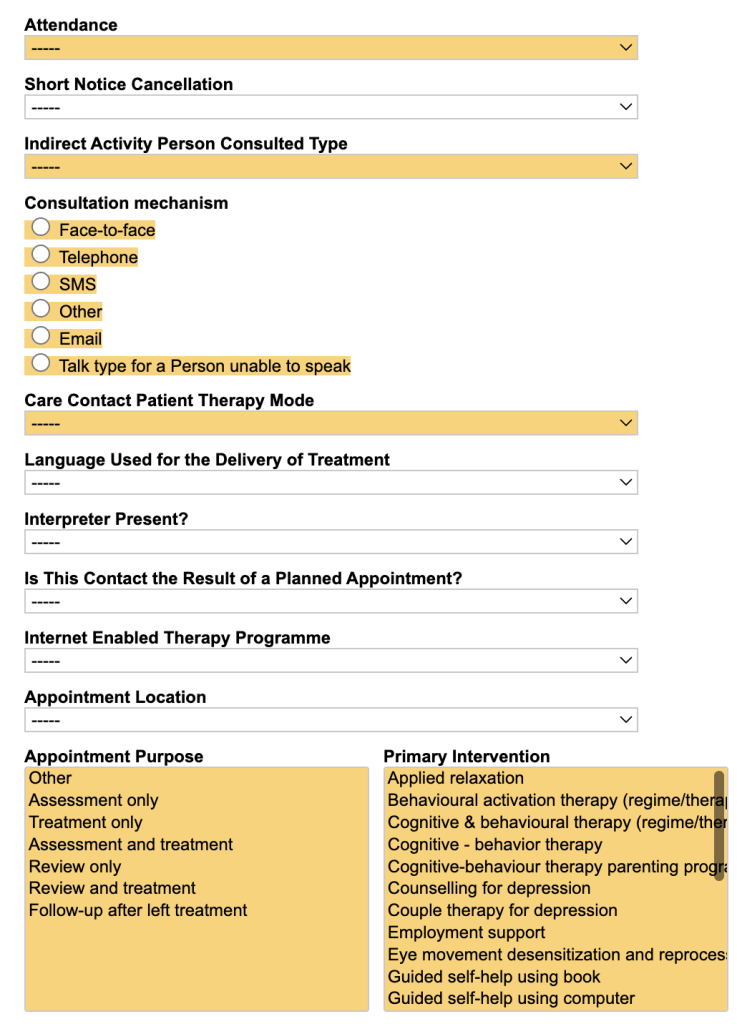
The options available in these lists can be edited by a superuser using the List Management area in the Super User Menu
You now have the option to ‘Save and continue later’. This will record the information you have entered so far, and updates the contact so it is highlighted as a red incomplete contact in the Clinical Contact carousel
Questionnaire Section 1
In this area you can record many of the MDS required fields for your contact, including the required questionnaires.
If you indicated that the contact should be recorded as a full MDS contact in the common fields section above, then several of these options will be mandatory and therefore yellow.

If you are completing questionnaires during the contact, you may wish to do this prior to completing a clinical contact appointment via the Complete a New Questionnaire section in the Clinical Contact Tab.
This will allow you to record the scores for each question, rather than just the total score for the questionnaire.
In addition, you may have our webforms service enabled, which allows patient to fill in their questionnaires prior to the session, as determined when creating their appointment in the Diary or the Diary Search.
The following items of data can be recorded in this area:
- Sign Post To – please note, you will still need to discharge the patient
- Total Questionnaire scores. These fields may already be populated if the client completed a webform prior to the appointment, or if you have already completed a questionnaire using iaptus for this contact.
- Employment Status
- Receiving SSP (Statutory Sick Pay)
- Receiving Benefits
- Use of Psychotropic Medication
- Step Intensity
- Honos Cluster – your service may have the Mental Health Clustering Tool questionnaire enabled to help you calculate Honos Clustering.
Again you have the option to ‘Save and continue later’. This will record the information you have entered so far, and updates the contact so it is highlighted as a red incomplete contact in the Clinical Contact carousel.

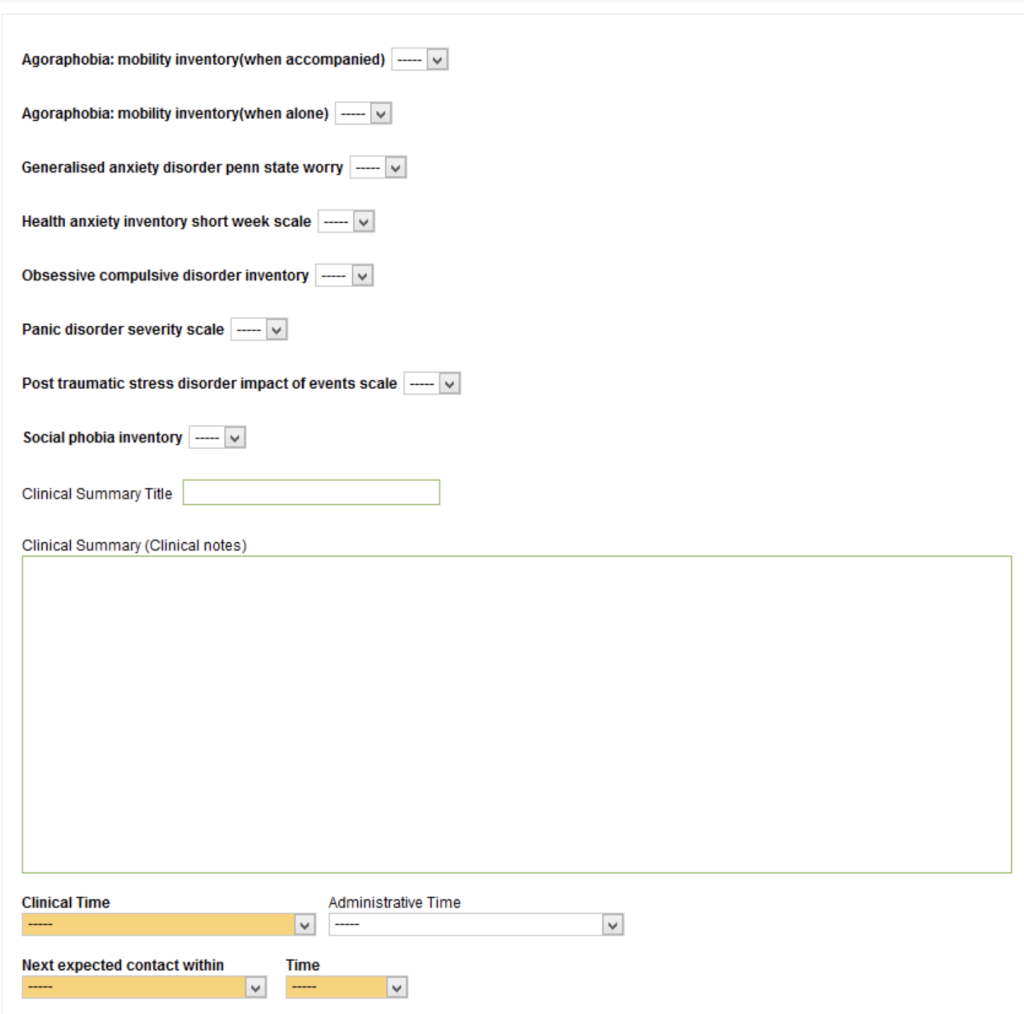
Questionnaire Section 2
In this final section you can record the contact notes, as well as the total scores for any of the ADSM (Anxiety Disorder Specific Measures) questionnaires.
These questionnaires can also be completed prior to filling in the clinical contact via the Complete a New Questionnaire section in the Clinical Contacts Tab. This will allow you to record the scores for each question, rather than just the total score. The Complete a New Questionnaire area also has the full range of questionnaires available for your service.
The following items of data can be recorded:
- Total Questionnaire scores. These fields may already be populated if you have already completed a questionnaire using iaptus for this contact.
- Clinical Summary Title – This will appear in the Clinical Contact carousel for this contact.
- Clinical Summary (Clinical notes)
- Clinical Time- How long you actually spent with the patient, not how long the appointment was for.
- Administrative Time – How long filling in the contact and other administrative tasks took.
- Next Expected Contact Within – This allows therapists to indicate when they would ideally next like to see the patient. This information is then displayed in the ‘Days’ column of their caseload in the My Patient Episodes area of the Left Hand Navigation Menu. You first select the time quantity (i.e. 2) in ‘Next Expected Contact Within’, and then the type of time period (i.e. weeks) in ‘Time’.
The only area that can be amended in this section is the ‘Next Expected Contact Within’ values, which superusers can amended using the Control Panel area of the Super User Menu.
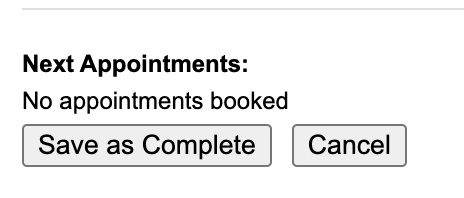
You now have the option to ‘Save as Complete’. This will record the information you have entered, and updates the contact so it is highlighted as a blue complete contact in the Clinical Contact carousel